Wednesday, November 30, 2011
Sausage Stuffed Mushrooms
We made these mushrooms last year at our family Thanksgivings and Christmases. We are now always expected to show up, mushrooms in hand. We normally pop them into the oven to cook when we arrive out our destination, but you can travel with them if you can keep them warm.
We can't take credit for the recipe (Thanks, Ina Garten!), but it's too good not to share. You can make the filling the day before and bake them right before you need to serve them.
Here's what you'll need:
16 extra large Baby Portabella mushrooms (regular baby bellas work fine, but if you can find stuffing mushrooms, grab them!)
5 Tbsp olive oil
2 1/2 Tbsp Marsala wine (may substitute medium sherry)
3/4 lb sweet Italian sausage (we actually use a pound, because we like having extra)
3 shallots, minced
2 cloves garlic, minced
2/3 cup panko bread crumbs
5 oz. marscarpone cheese
1/3 cup grated Parmesan
2 1/2 Tbsp fresh parsley, minced
Salt and freshly ground pepper
Start off by preheating your oven to 325 F.
Clean the mushrooms by wiping gently with a damp paper towel.
Remove stems and chop finely.
Throw the mushroom caps in a bowl and coat with 3 tablespoons of olive oil and the marsala wine. Let them hang out and soak up all that flavor while you make the filling.
Mince up the shallot and garlic.
Heat the remaining olive oil over medium heat. Toss in the sausage and brown completely, about 8-10 minutes. Once browned, add the shallot and garlic and let that cook for a couple minutes to soften them up.
Add the chopped mushroom stems, stir and cook for about 3 more minutes. The mushrooms will start to brown up and shrink in size.
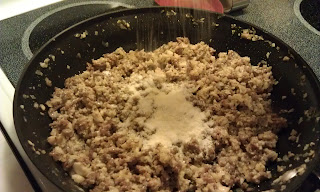
Add in the panko and then marscarpone. Continue to cook until the marscapone gets all melty and delicious.
Remove from heat and stir in the parsley, Parmesan, and season with salt and pepper to taste. If you're making the filling the day before, this is where you stop and put it in the fridge. Just heat the stuffing through a bit before you put them in the mushrooms.
Fill each mushroom with the sausage mixture, so that it puffs out over the top of the mushroom cap. Place all your stuffed mushrooms into a baking dish - don't worry if they're touching.
We typically have extra filling (on purpose). We'll follow up with what tasty dish we make with the extra filling.
Bake for approximately 50 minutes, or until the stuffing looks brown and crusty on top.
Enjoy!
Monday, November 28, 2011
Spinach Feta Casserole
This is a family favorite in Michelle's family. It graces our table for just about every holiday meal. And the best part - it's seriously easy to make, which makes holiday cooking that much easier. We recommend you make it for your upcoming holiday celebrations.
Here's what you need:
2 packages of frozen spinach
3 eggs
2 cups small curd cottage cheese
1 6 oz tub of feta cheese
1/4 cup butter
3 Tbsp flour
1 shallot
Dash of nutmeg
kosher salt
freshly ground black pepper.
Here's what you do:
Thaw your spinach completely and squeeze out as much water as you can. We like to line a strainer with paper towels and let it strain out while it's thawing.
Next, dice your shallot.
Beat the eggs and soften your butter.
Sprinkle in a dash of nutmeg.
Mix everything up in a large mixing bowl.
Spray a 9" x 13" baking dish. Pour your mixed spinach mixture in and spread evenly throughout.
Now, you can make this ahead of time and let sit in the fridge until you're ready to bake it and put it on the table. We mixed ours at home, then traveled to our holiday party and popped it in the oven right before the meal.
Enjoy!
Saturday, November 26, 2011
Fried Eggs with Brown Butter Caper Sauce
Weekend breakfast is an important meal in our home. We like taking a little extra time and making something special together on a Saturday or Sunday morning. We made this last weekend for Sunday brunch. It only takes about 15 minutes, because the hash browns take a little longer to crisp up.
Here's what you need:
4 eggs
4 Tbsp butter, divided
1/2 Tbsp capers
Freshly ground black pepper
Cilantro/Parsley to garnish
2 cups hash browns
about 1/4 cup vegetable oil
Kosher salt
Here's what you do:
Heat a 12" skillet just above medium heat. Add the vegetable oil and the hash browns and toss around to coat the hash browns in the oil.
Let your hash browns cook for about 5 minutes, then in a small skillet, heat 2 tablespoons of butter over medium heat. When the butter is almost completely melted, toss in the capers.
Hopefully by how, your hash browns look like this, which is just about half way finished.
In a third skillet, melt another tablespoon of butter in a 12" skillet.
Once the butter is melted like above, add your eggs to the skillet. We like to crack our eggs into custard cups and then gently slide them in the pan. This also prevents any chance of cracking shells into your eggs. Pepper them, but hold off on the salt. The capers should have plenty of salt flavor.
We let them all cook together in one big mass for a bit, then break them apart with a spatula.
Keep an eye on your brown butter caper sauce, when it looks like this, pull it off the heat. You can't really see it, but the capers have gotten crispy.
Flip your eggs gently and as quick as you can. Keep them low in the pan to try to keep the eggs from breaking. Sorry for the blurry picture!
Don't season this side, because you should have seasoned the flip side well enough. Let the eggs cook for just about a minute to set the white. We like runny yolks, plus it's going to be an additional "sauce" over your hash browns.
Plate by putting a bed of crispy hash browns down first. Top with your egg and then pour the brown butter caper sauce over that. Finally, sprinkle some chopped cilantro (or parsley) over that.
Enjoy!
Thursday, November 24, 2011
Happy Thanksgiving!
As you may have guessed, Thanksgiving is one of our favorite holidays. We love getting together with our family, and of course, all of the tasty food.
No recipes today, but we wanted to wish everyone a Happy Thanksgiving and hope you all are also enjoying some great food. We'll have our Thanksgiving creations up for you soon!
Tuesday, November 22, 2011
Bean Salad
We mentioned before that we went to a Food Day party. We made the amazing couscous and chickpea salad. Our friends Laura and Tony made this delectable bean salad. Of course, we had to get the recipe. We finally tried it out for ourselves, and it was still really tasty... even if we did forget to buy the red pepper.
Here's what you need:
1 can white beans
There was a sale on Bush's Beans! |
1 can black beans
1 can pinto beans
1/3 cup red wine vinegar
1/4 cup extra virgin olive oil
4 Tbsp balsamic vinegar
3 Tbsp honey
1/4 cup scallions
3/4 cup red onion (one small red onion)
1 red bell pepper
Kosher salt
Freshly ground black pepper
Here's what you do:
Rinse and chop your scallions.
Dice your red onion.
This is where you would also dice your red pepper. Oops.
Dump all or your beans into a strainer and rinse them. Stir them around a bit to make sure they all get a good rinse.
Dump the beans, scallions, red onion, and red pepper into a large mixing bowl.
Add the balsamic,
And the red wine vinegar,
The honey,
And finally, the olive oil.
Stir this mixture up thoroughly. You want to make sure everything is evenly coated with the dressing. If you want to mix the dressing up before hand to make sure it emulsifies, that might be a good idea. We didn't think of that until just now. Did we mention we were tired when we made this? Well, we were. Anyway, mix that all up and enjoy. We had some right away, but I'm guessing it will taste even better after sitting in the fridge for a couple of hours.
Enjoy!
Sunday, November 20, 2011
The Flat Whisk
Today we're highlighting one of our favorite tools - the flat whisk. If you ever deglaze a pan, this kitchen tool is a must. Yes, a regular whisk will do the job, but the flat whisk really gets in the edges of the pan and gets all of the good bits of flavor off the bottom. It also does a wonderful job with making the roux for gravy or sauces like hollandaise. We're huge fans of tools that make things easier in the kitchen, and this tool definitely delivers.
We have a silicone coated flat whisk, which is great because the sound of metal on metal sets Michelle's teeth on edge. It also protects your non-stick pans from scratching.
We give the flat whisk four thumbs up.
Friday, November 18, 2011
Taco Casserole
Michelle really wanted tacos one night. The problem was, Zack's neck was still giving him problems. Tacos require one to be able to tilt their head to the side. So, we created this amazingly tasty taco casserole instead. It's going in the regular rotation. The best thing about this casserole, is you can alter it to fit your tastes.
Here's what you need:
1 lb. ground beef (we used 85% lean ground chuck)
1 medium onion
2 tsp chili powder
1 tsp cumin
1 can black beans
1 cup sour cream
1 can diced green chilis (Michelle bought the right ones this time!)
1 package tortillas
3 plum (Roma) tomatoes
2 1/2 cups shredded cheddar cheese
Here's what you do:
Preheat your oven to 350 F.
Start by dicing your onion. A medium dice will do. The onion is going to cook down with the meat.
Toss your meat and onion in a 12" skillet and let it brown away.
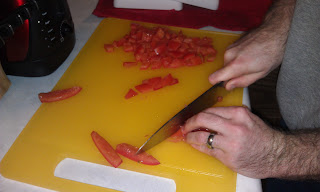
While the meat is doing it's thing, seed and dice your tomato.
Drain and rinse your beans. Oops, forgot the picture.
Slice your tortillas.
Combine your sour cream and green chilis.
Once there's absolutely NO pink left on the meat, add the salsa.
Then the beans.
And finally the cumin and chili powder. Give that a good stir. Let that simmer for a few minutes to thicken up.
Now, we build our casserole.
Spray a 9" x 13" casserole dish with cooking spray. Scoop half of the meat mixture onto the bottom of the dish. We actually added a little bit more after the picture was taken and we realized it wasn't covering the bottom.
Top with half of the green chili sour cream and smooth it out.
Now, layer on your tortillas.
And top with half the cheese and tomato.
Now repeat.
Meat. Sour cream. Tortillas. Cheese & tomato.
That was a little redundant, sorry.
Now, just toss that in your oven for 20-25 minutes, or until the cheese has melted and the tortillas have crisped up.
You can also throw in some sliced black olives, scallions, or cilantro.
Enjoy!
Subscribe to:
Posts (Atom)